Today, we'll learn about the basic building blocks of Angular framework. These building blocks are the basis for any angular application and are as following:
- Components
- Templates
- Directives
- Dependency Injection
In this article of the Angular tutorial series, we'll focus on Components and Templates only. Let's start.
What is Component?
Components are the key building block of an Angular application and comprises of a TypeScript class, and HTML Template and a CSS file. Here, HTML template and/or CSS can either be a seperate file or inline, defined in class file itself.
How to create a Component?
You can either create a component using CLI command or by following the manual process. Here, I'll tell you the CLI command with few parameters that can be passed to the command.
ng generate component hello-worldHere, "hello-world" is the component name of your application. You can also shortened the command as:
ng g c hello-worldHere, g is for generate and c is for component. This command will create 4 files in a folder as your component name; example shown below:
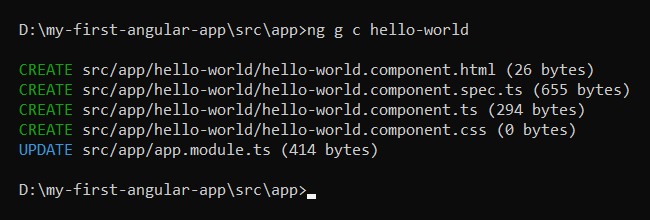
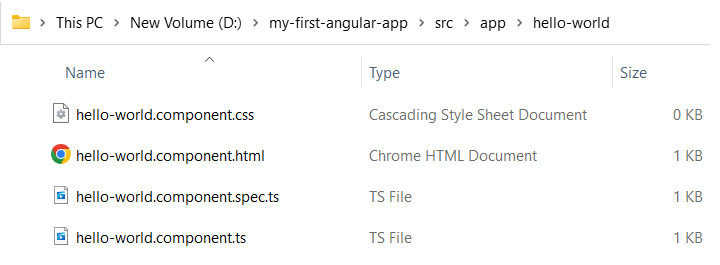
- hello-world.component.css - CSS file where our element styling and CSS classes exist
- hello-world.component.html - Template file where our HTML code resides
- hello-world.component.spec.ts - Test Specification file where our unit test code resides
- hello-world.component.ts - TypeScript Class file where our business logic and web service calls reside
Let's deep dive into each & every line of code created in this new component.
import { Component, OnInit } from '@angular/core';
Using import statement, we can import npm packages and/or other Angular components or libraries. And, the statement shown is the first import statement in our newly created component.
@Component({
    selector: 'app-hello-world',
    templateUrl: './hello-world.component.html',
    styleUrls: ['./hello-world.component.css']
})
Here, @Component is the decorator used to denote that the class defined is of Component type. It specifies the selector to be used for this component which is much similar to that of HTML tags e.g. div, span, etc. To use this component in any other component, we can use it as <app-hello-world></app-hello-world>
The next statement templateUrl defines the path of the HTML template file to be rendered for this component. Instead of using a separate HTML template file, we can also declare inline HTML code, example shown below:
@Component({
    selector: 'app-hello-world',
    template: '<h2>Hello World!</h2><p>This is my first Angular application with Hello World component.</p>',
    styleUrls: ['./hello-world.component.css']
})
The next statement styleUrls: ['./hello-world.component.css'] denotes the path of css files to be used in the application. It can contain an array of CSS files. In addition to that, we can also define inline CSS like the example shown below:
@Component({
    selector: 'app-hello-world',
    template: '<h2>Hello World!</h2><p>This is my first Angular application with Hello World component.</p>',
    styles: ['h2 { color: red; font-weight: 600; }']
})
However, this is not mandatory to specify the styles or styleUrls. We can create a common CSS file or use some CSS frameworks or libraries like Angular Material or Bootstrap for styling our application.
export class HelloWorldComponent implements OnInit {

    constructor() { }

    ngOnInit(): void {
    }

}
The next line of code export class HelloWorldComponent denotes that this is a class with name "HelloWorldComponent" and is exporting it for use in other components. We'll cover parent-child components in another article that will explain it's better usage that why do we export our Angular components like this. For now, you may simply understand that we can import our own created components in any other component using the import keyword.
Then, we have a constructor function which is always called when a new instance of the component is created. And, the next statement ngOnInit() is a lifecycle hook which in itself is a big concept in Angular.
What are Lifecycle Hooks?
Every component has a lifecycle from initialization to it's destruction. In between, there are many phases that we call lifecycle hooks. Below table can give you a quick understanding of the different lifecycle hooks available in Angular with their use and also the sequence in which they're been called.
| Name of Method | Use/Purpose |
|---|---|
ngOnChanges |
Called every time when there is a change detected in Input/Output. The key purpose of having this lifecycle hook is to bind changes for parent-child components. |
ngOnInit |
Called on first initialization of component, but after execution of first ngOnChanges. The key purpose of having this lifecycle hook is to initialize the data, required to render on the page. |
ngDoCheck |
This is a custom change detection, called by developer. |
ngAfterContentInit |
Called when component content has been initialized. |
ngAfterContentChecked |
Called every time after component content is checked. |
ngAfterViewInit |
Called when the component view is initialized. |
ngAfterViewChecked |
Called every time after component view is checked. |
ngOnDestroy |
Called before the component is been destroyed. The key purpose of having this lifecycle hook is to destroy all the observations, to avoid memory leakage. |
What is Template in Angular?
In general terms, a Template in Angular is an HTML file that contains the UI of the application. While variables are defined and business logic is written in components, templates are used to render the value of those variables. To secure the application from script injection attacks, Angular does not allow using <script> tags in Template file(s). In addition to that, <html> and <body> tags are defined in index.html in the root folder.
There are few mechanisms that are used in Templates for binding data, applying logical display of the HTML tags, modifying CSS classes or attributes dynamically, event binding, etc. We'll cover a brief introduction of few of these mechanisms.
Data Binding and Interpolation:
In Angular, there are 3 types of Interpolation or Data Binding is available:
- Variable Binding
- Property Binding
- Event Binding
Let's discuss each with an example:
Variable Binding/String Interpolation:
Using double curly braces {{ }}, we can bind the data in our templates files, by specifying the variable in between.
import { Component, OnInit } from '@angular/core';

@Component({
  selector: 'app-hello-world',
  templateUrl: './hello-world.component.html'
})
export class HelloWorldComponent implements OnInit {

  heading: string = '';

  constructor() { }

  ngOnInit(): void {
    this.heading = 'Hello World!';
  }

}
<!-- An Example -->
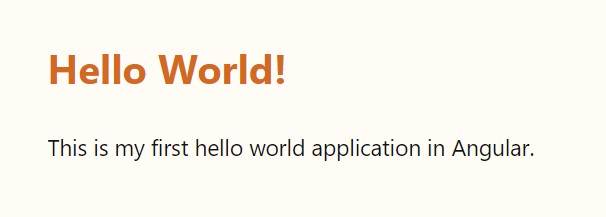
<h2>{{heading}}</h2>
<p>This is my first hello world application in Angular.</p>
The output of this code will look like:
Property Binding:
Property Binding in Angular is much useful as it can be used to dynamically set the various HTML attributes like ID, href value for links, CSS classes, etc. Here's an example of property binding:
import { Component, OnInit } from '@angular/core';

@Component({
  selector: 'app-hello-world',
  templateUrl: './hello-world.component.html'
})
export class HelloWorldComponent implements OnInit {

  firstName: string = '';
  lastName: string = '';
  topicName: string = '';
  topicUrl: string = '';

  constructor() { }

  ngOnInit(): void {
    this.firstName = 'John';
    this.lastName = 'Doe';
    this.topicName = 'Components & Templates';
    this.topicUrl = 'https://www.deepakjain.co.in/blog/tech-blogs/day-02-components-and-templates';
  }

}
<!-- An Example of String Interpolation and Variable Binding -->
<h2>{{ 'Welcome ' + firstName + '!' }}</h2>


<!-- Another Example of Variable Binding -->
<p>This is my first Angular application and today I am learning about {{ topicName }}.</p>


<!-- This is an Example of Property Binding or Attribute Binding -->
<a [href]="topicUrl" title="{{ 'Click to know more about ' + topicName }}">Know More</a>
The output of this code will look like:

In addition to the variables and string interpolation, an expression can also be passed to bind the calculated value to the HTML attributes. Sometimes, in case of parent-child components and FormArray, we need to assign unique IDs where this dynamic expression is much useful. Further, it depends on your business logic and the project requirements.
Event Binding:
For event binding, instead of using double curly braces or square brackets, we use parenthesis to bind with the event handler. Given below is an example of few different scenarios and event handlers and how we bind event handlers in Angular:
import { Component, OnInit } from '@angular/core';

@Component({
  selector: 'app-hello-world',
  templateUrl: './hello-world.component.html'
})
export class HelloWorldComponent implements OnInit {

  firstName: string = '';
  lastName: string = '';
  topicName: string = '';
  topicUrl: string = '';

  constructor() { }

  ngOnInit(): void {
    this.firstName = 'John';
    this.lastName = 'Doe';
    this.topicName = 'Components & Templates';
    this.topicUrl = 'https://www.deepakjain.co.in/blog/tech-blogs/day-02-components-and-templates';
  }

  onView() {
    // Write your code here..
  }

  onShare() {
    // Write your code here..
  }

}
<!-- Continuing with the previous code example -->
<h2>{{ 'Welcome ' + firstName + '!' }}</h2>
<p>This is my first Angular application and today I am learning about {{ topicName }}.</p>
<!-- This is an Example of Event Binding -->
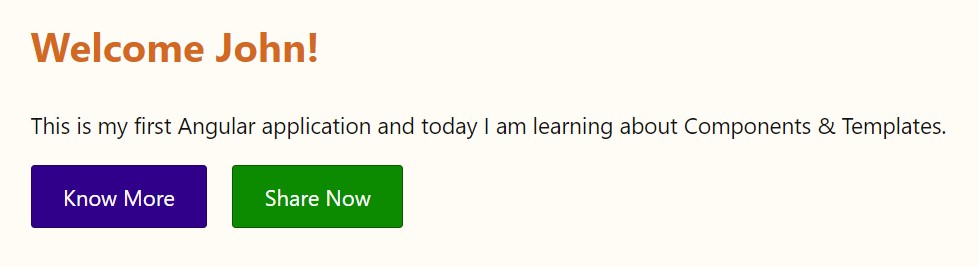
<button (click)="onView()" title="{{ 'Click to know more about ' + topicName }}" class="btn btn-primary">Know More</button>
<button (click)="onShare()" title="Click to share on social media" class="btn btn-secondary">Share Now</button>
The output of this code will look like:
Here, we have learnt the basics of Templates in Angular with few examples.
End Note:
This was a quick overview of the Components & Templates in Angular. If you want to learn Angular properly then going for a full-fledge video course would be the right approach. This tutorial series can only give you a basic understanding of the concepts of Angular.
Keep Learning!
Share this blog on:

About Author
Deepak Jain is an experienced professional full-stack developer, UI/UX designer, ex-startup entrepreneur, passionately writes blog on technology, startups, business ideas. He also shares his own life experiences and creates awesome inspiring stories from the lives of people. Check out full profile